Why should I remove my Photo Background?
When you want to design something with a photo, you may not like the background contained on the image and you may want it removed for aesthetic purposes, which is why vehicle photo editing service comes in. Another reason to remove the background from your image is to give your product photo a touch of uniqueness.
Unique images play an important role in boosting your car business and there isn’t an alternative to background removal. Lastly, another reason to seek the help of background removal service is to make your car photo look precisely as you want it. You may need to change image backgrounds to make it look just how you want them to.
“A photograph is a secret about a secret. The more it tells you the less you know.”
Step1: Open the image
The first thing that you need to do when you want to remove car photo background is to open the car image that you wish to remove the background in Photoshop. Also, ensure that you have the new background image at the ready.

Step 2: Drag the image to the new background
The next step in the background removal process is to take the Selection Tool and use it to drag that containing your subject over to the background that you want to use. In most cases, these images won’t be of the same sizes but the good thing is that you can adjust your car image size as standard scaling guideline in Transform by pressing Ctrl + T, while holding the shift key on your keyboard as you drag the handles of the Transform Box. Place the car photo where you would want it to be then locking it in by pressing enter on your keyboard.

Oh Shit, I wanna share my last work video snippet for removing your boring fellness.
Step 3: Make a Selection
The next stage of your car photo editing is making a selection. There are many tools like Lasso or Magic Wand that you can use, but if you are changing your car image for the first time, just stick with the Quick Selection tool. Select parts of the car photo image you want to retain by running Quick Tool over the photo to tell Photoshop areas that you want to take.
Do not worry even if the tool appears to grab too much, because you can remove anything you don’t want by holding the alt key.

Step 4: Refine
After selecting the car image, you just finish it off by clicking Refine Edge located at the top end of the screen to get rid of the background.
An alternative way of doing this in an easier way to achieve this in Photoshop CC is to use Select Focus Areas. In case the tool fails to capture anything you wanted to be kept, just select the areas and Photoshop automatically recalculates the selection.
This can be achieved similarly if you were using Quick Selection tool. This can be achieved through Refine Edge, which you can find in Focus Area box. You can adjust it to clean up final image, for instance adjusting the radius slider to pick stray hairs and even removing background between them.
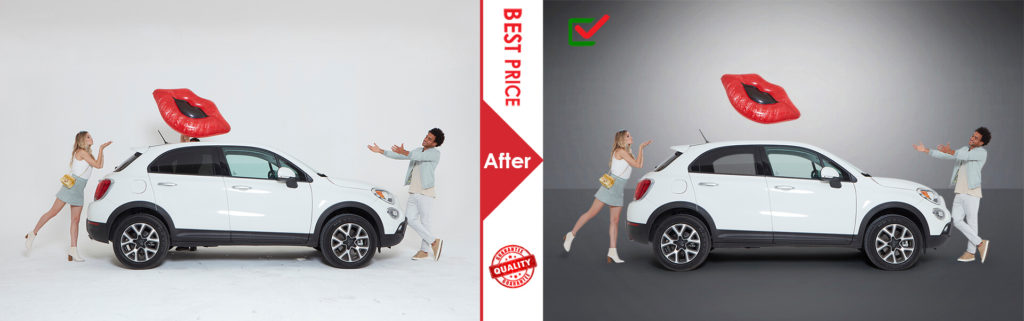
Finally, we got our desired image
Both the methods are pretty simple to start with when you want to remove car photo background, but clearer your car photo is from the background, the less challenging it will be for Photoshop to choose the selection. Therefore select your image wisely to have a fabulous car photo editing service experience.
daisoftware February 16, 2019 at 7:27 am
Hey, very nice site. I came across this on Google, and I am stoked that I did. I will definitely be coming back here more often. Wish I could add to the conversation and bring a bit more to the table, but am just taking in as much info as I can at the moment. Thanks for sharing.